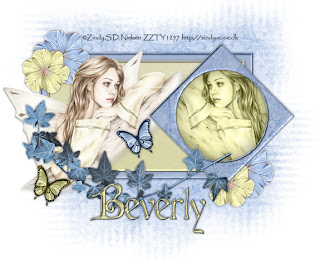
 Clicking on the image will enlarge to full view.
Supplies
1 tube of choice - I’m using the artwork of Zindy S.D. Nielsen here.
Font of Choice - Cardinal alternate here
Weescotlass Mask 81 here
jbs2designs Template 42 here
“Blue Dream” is a FTU tagger size scrap kit created by RebelChick’s Scraps and can be found on her blog Whispers of a Memory. Please leave a thank you when downloading as it’s a small gesture for hard work given freely.
Thank you Reb for a beautifully amazing kit!!
This tutorial was written assuming you have working knowledge of PSP.
~♥~ Let’s get started ~♥~
Open up the template.
Shift + D. Close out the original.
Delete the copyright and brush layer.
Resize all layers 110%.
Image/Canvas Size
700 X 700
New Raster layer.
Send to bottom.
Flood fill white.
Highlight Large Rectangle layer.
Select All/Float/Defloat
New Raster Layer
Copy and paste a paper of choice Into Selection.
Deselect.
Delete the template layer.
Give it a slight inner bevel:
Repeat the above step with the Small Rectangle Layer.
Highlight the Diamond Layer.
Select All/Float/Defloat
New Raster Layer
Copy and paste a paper of choice Into Selection.
Deselect.
Delete the template layer.
DO NOT ADD THE INNER BEVEL TO THIS LAYER YET.
Highlight the Circle layer.
Select All/Float/Defloat
Highlight the Diamond layer.
Tap the delete key.
Highlight the Circle layer again and move below the Diamond Layer.
Selections/Modify/Expand by 2.
New Raster Layer.
Copy and Paste a paper of choice Into Selection.
New Raster Layer.
Effects/3D Effects/Cutout
Vertical and Horizontal: 10
Opacity: 24
Blur: 35
Color: Black
OK
New Raster layer.
Apply the same cutout accept change Horizontal & Vertical numbers to -10.
Deselect.
Highlight the Diamond Layer.
Give it the inner bevel.
Copy and paste your tube as a new layer.
Position it to the left of the circle.
When you have it exactly where you want it, duplicate, mirror, move it below the cutout layers in the layers pallet, and position the duplicated tube layer below the diamond layer.
Once you have it exactly where you want it, click inside the diamond layer with your Magic Wand.
Selections/Modify/Expand by 2.
Highlight your duplicated tube layer and tap the delete key.
Deselect.
Change the Properties to Luminance Legacy.
Add your embellishments. I used:
Flower 4: Resize 50%
Flower 3: Resize 60%
Ivy: Resize 80%. Free Rotate L 45 degrees
Butterflies: Resize 20%. Free rotate 25 degrees
Highlight your white canvas.
New Raster Layer.
Select All.
Copy and paste a paper of choice Into Selection.
Deselect.
Apply the mask.
Merge Group.
Use your Pick Tool and bring the top and bottom of the mask in just a little.
Add your copyrights.
Add your name.
I gave mine the same inner bevel.
Crop your image.
Resize all layers 85%.
I hope you enjoyed this tutorial.
I’d love to see your results and show it off in my Show Arena.
Email me!
Hugs,
Bev

No comments:
Post a Comment