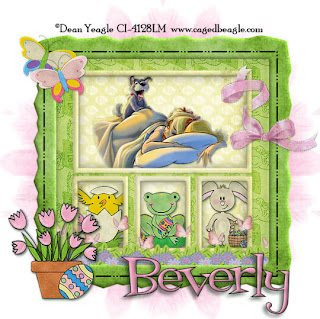
Clicking on the image will enlarge to full view
Supplies Needed
1 tube of choice (or image). I'm using the artwork of Dean Yeagle which you can purchase here
Font of choice - I'm using Fontdinerdotcom Loungy here
Weescotlass Mask 259 here
Template 2 by Gothic Realm Creations here
"Hauoli Pakoa" (Happy Easter) PTU scrap kit created by Alane of Inspired to Dream Scraps and can be found here.
Thank you so much Alane for another beautiful kit!
I had loads of fun with this one!!
This tutorial was written assuming you have working knowledge of PSP.
~♥~ Let’s get started ~♥~
Open up the template. Delete the copyright and 4 heart layers.
Click on the icon at the top of the screen that will rotate all layers to the right.
Highlight the Fill layer. Select All/Float/Defloat. Copy and paste a paper of choice as a new layer. Selections/Invert. Hit the delete button. Deselect. Delete the template layer. Give it an inner bevel. I used:
Bevel: 2
Width: 3
Smoothness: 35
Depth: 2
Ambience: -8
Shininess: 10
Color: white
Angel: 315
Intensity: 75
Elevation: 20
Ok
Repeat the above steps on the Frames and Small Frames layers.
Highlight Raster 2. Select All/Float/Defloat. Copy and paste a paper of choice as a new layer. Selections/Invert. Hit the delete key. Deselect. Delete the template layer.
Highlight your small frames layer. Use your Magic Wand and click inside the top rectangle. Selections/Modify/Expand by 5. Copy and paste your tube/image of choice. If you like, feather your tube or image. Selections/Invert. Hit the delete key.
Repeat the above step with the 3 lower rectangles. In each use an element from the kit. I used:
Bunny 6 – Resize 15% and 40%
Frog 1 – Resize 15% and 40%
Chick 2 – Resize 15% and 50%
Copy and paste Floral ribbon 2 as a new layer. Resize 25%. Highlight The Frame layer. Use your Magic Wand and click inside of it. Selections/Invert. Now highlight the Floral Ribbon layer. Use your Eraser Tool and erase what is overlapping on the frame. Deselect.
Copy and paste Picot Bow 5 as a new layer. Resize 15%, 75%, and 90%. Free rotate left 20 degrees. Move into position. See my tag for reference. Get it exactly where you want it. Duplicate and move the layer beneath the frame. Use your eraser tool and erase a small part of the ribbon to give it the affect as if it’s wound around the frame.
Copy and paste Potted Tulips 1 as a new layer. Resize 15% and 80%.
Copy and pate Butterflies 1 & 2 as new layers. Resizing each 15% and 55%.
Add your copyrights.
Add your name. Give it the same inner bevel.
I hope you enjoyed this tutorial.
I’d love to see your results.
Email me!
Hugs,
Bev

No comments:
Post a Comment