Supplies
Font of Choice - I used HandScript here
Weescotlass Mask 249 here
Scrapity Scrap and More Template #40 here
“Samhain” is a PTU tagger size scrap kit created by Helga of Classic Creationz and can be purchased at Scraps with Attitude. You can visit Helga's blog here.
Thank you Helga for such a festive kit!
This tutorial was written assuming you have a working knowledge of PSP.
~♥~ Let’s get started ~♥~
Open up the template.
Shift + D.
Close out the original.
Delete the credit layer.
Image/Canvas Size
700 X 700
Highlight the background layer and flood fill white.
Highlight the Big Circle layer.
Select All/Float/Defloat
New Raster Layer.
Flood fill with a gradient that’s complimentary to your tubes and papers in the kit.
Deselect.
Delete the template layer.
Highlight Border Big Circle.
Select All/Float/Defloat
New Raster Layer.
Flood fill with a dark color of your choice.
Deselect.
Delete the template layer.
.
Highlight Small Circle Layer.
Select All/Float/Defloat
New Raster Layer.
Flood fill with a light color that’s complimentary to your tubes and papers in the kit.
Deselect.
Delete the template layer.
Highlight Border Smaller Circle layer.
Select All/Float/Defloat
New Raster Layer.
Flood fill with a contrasting color that’s complimentary to your tubes and papers in the kit.
Deselect.
Delete the template layer.
Highlight Big Rectangle Layer.
Select All/Float/Defloat
Copy and paste a paper of choice as a new layer.
Selections/Invert
Tap the delete key.
Deselect.
Delete the template layer.
Highlight the Square layer.
Select All/Float/Defloat
New Raster layer.
Flood fill with a gradient of choice.
Deselect.
Delete the template layer.
Highlight the Line Square layer.
Select All/Float/Defloat
Copy and paste a paper of choice as a new layer.
Selections/Invert
Tap the delete key.
Deselect.
Delete the template layer.
Merge Visible Border Top, Border Mid, and Border Bottom Rectangle layers.
Select All/Float/Defloat
New Raster layer.
Flood fill with the same color you used on the border of the large circle layer.
Deselect.
Delete the template layer.
Merge Visible Top, Mid, and Bottom Rectangle layers.
Select All/Float/Defloat
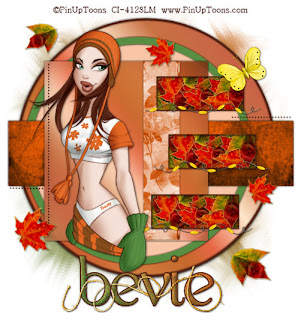
Copy and paste the leaves as new layers. Resize them small - to your liking. Duplicate them many times as you like and arrange them within the dotted lines of the top rectangle. Once you’ve done that then highlight the top leaf in your layers pallet and keep merging down until you have all leaves on one layer.
Selections/Invert
Tap the delete key.
Deselect.
Duplicate twice and move each duplicated layer below each of the other frames.
Highlight Small Dotted Lines layer.
Select All/Float/Defloat
Create a new image and flood fill with the same color you used for the large circle frame and the rectangle frames.
Copy.
Paste it on your working canvas as a new layer.
Selections/Invert
Delete the dotted layers template.
Repeat the above step with the Long Dotted Line layer.
Copy and paste your tube as a new layer.
Add your embellishments. I used:
Butterfly 3: Resize 30%. Free rotate left 30 degrees
Beaded wire: Resize 30%. Duplicate/Merge Down.
Leaf Glitter 1 & 2: Resize different sizes
Highlight your white background.
New Raster layer.
Flood fill with a gradient of choice.
Apply the mask.
Merge Group.
Resize 110%
Add your copyrights.
Add your name.
I gave mine a touch of Noise.
Copy and paste Rope as a new layer.
Resize 50%
Make it appear as if it’s looped through your name.
Resize all layers 80%.
I hope you enjoyed this tutorial.
I’d love to see your results and show it off in my Show Arena.
Email me!
Hugs,
Bev


No comments:
Post a Comment