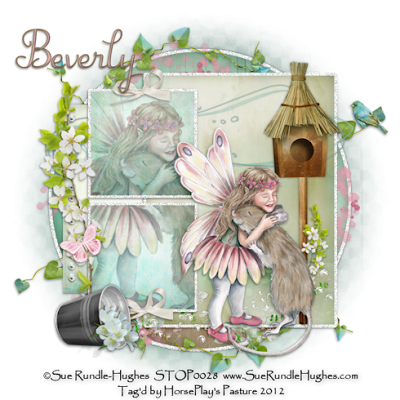
Supplies
1 tube of choice – I used the beautiful artwork of Sue Rundle-Hughes
which can be purchased from PSP TubeStop. You must have a license to use.
Font of choice - I used Suilly la Tour here
My template 143 here
“Summer Fresh” is a tagger size scrap kit (also available in Full size too) created by Kesha of KnC
Scrapz and can be purchased from her store Lollipops n Gumdrops. You can
visit her blog here.
Thank you Kesha for another really beautiful kit.
This tutorial was written assuming you have a working knowledge of PSP.
~♥~ Let’s get started ~♥~
Open up the template.
Shift + D.
Close out the original.
Image/Canvas Size:
700 x 700
OK
Highlight the background layer.
Flood fill white.
Delete the credit layer.
Highlight the Circle layer.
Click on it with your Magic Wand.
New Raster layer.
Copy and paste Paper 10 Into Selection.
Deselect.
Delete the template layer.
Highlight Rectangle 1 layer.
Click on it with your Magic Wand.
New Raster layer.
Copy and paste Paper 5 Into Selection.
Deselect.
Delete the template layer.
Give it a slight Inner Bevel:
Highlight Rectangle 2 layer.
Click on it with your Magic Wand.
New Raster layer.
Copy and paste Paper 4 Into Selection.
Deselect.
Delete the template layer.
Highlight Top Square layer.
Click on it with your Magic Wand.
New Raster layer.
Copy and paste Paper 8 Into Selection.
Deselect.
Delete the template layer.
Highlight Bottom Square layer.
Repeat the above step.
Copy and paste your tube as a new layer.
Move this into position over both square layers – resize the tube
larger if you need to.
Highlight the top square paper layer.
Click anywhere outside of it with your Magic Wand.
Selections/Invert
Highlight the tube layer.
Right click your mouse over the layer.
Promote Section to layer.
Deselect.
Highlight the bottom square paper layer.
Repeat the above step.
Delete the original tube layer.
To both promoted layers:
Change the Properties to Multiply
Lower the Opacity to about 53.
Add your elements. I used:
Birdhouse: Resize
40%
Bow 2: Resize 20%
and 70%/Duplicate
Branch: Resize
30%/Free rotate Right 70 degrees/Duplicate/Mirror/Resize 50%
Element 4: Resize
25%
Bucket: Resize
15%
Butterfly:
Resize 20% and 70%/Use your Target Tool to change to a color chosen from
your tube.
Doodle: Resize
70%
Element 6: Resize
80%/Erase the vine area that sticks out too far/Duplicate/Flip/Mirror
Bird: Resize
15%
Element 8: Resize
40%/Use Target Tool and change to the same color you did the butterfly.
Highlight your white background.
New Raster layer.
Select All.
Copy and paste Paper 7 Into Selection.
Apply the mask.
Resize 105%
Merge Group.
Add your credits.
Add your name.
Foreground: #8f785c
Background: #e4b3b4
Stroke: 1
Type your name.
Apply a slight Inner Bevel:
Resize all layers 80%.


No comments:
Post a Comment