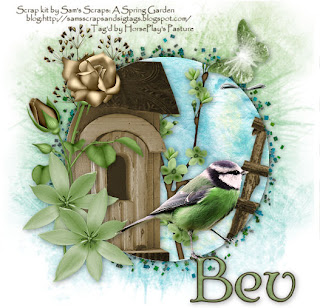
Clicking on the image will enlarge to full view.
Supplies
Font of choice - I used Albermarle Swash here
Gems mask 136 here
“A Spring Garden” is a PTU tagger size scrap kit created by Sam of Sam’s Scraps and can be purchased at Twilight Scraps. You can visit her blog here.
Thank you Sam for an amazing garden kit!
This tutorial was written assuming you have a working knowledge of PSP.
~♥~ Let’s get started ~♥~
Open up a 700 X 700 blank canvas.
Flood fill white.
Choose a paper that you want to use for your circle and open it up.
Make your Ellipse Tool active.
In your color pallet:
Foreground: Null
Background: Patten - find your paper
Angle: 0
Scale: 50
OK
Make your white canvas active.
Draw out a circle that’s approximately 400 x 400
Objects/Align/Center in Canvas
Convert to Raster layer.
All resizing of any embellishments in this tutorial will be approximate as it depends on how small or large you made your circle.
Be sure your Circle is highlighted:
Select All/Float/Defloat
Copy and paste Birdhouse as a new layer.
Position it where you want it in your circle.
Selections/Invert
Tap the delete key.
DO NOT DESELECT
Copy and paste Flower 5 as a new layer.
Resize 80%
Move into position behind the birdhouse.
Tap the delete key.
Deselect.
Copy and paste the ladder as a new layer.
Free rotate right 20 degrees.
Position it where you like over the circle.
Highlight your circle layer.
Select All/Float/Defloat
Selections/Invert
Highlight the ladder layer.
Tap the delete key.
Deselect.
Add your embellishments. I used:
Glitter Trail 2: Resize 60%
Flower 6
Flower 3: Resize 80%
Flower 7: Resize 30% Duplicate/Mirror
Backwards Staple: Resize 50%
Glitter butterfly 2: Mirror/Resize 40% Free rotate right 25 degrees
Bird 1: Resize 50%
Crop your image.
Highlight your white background.
New Raster layer.
Select All.
Copy and paste a paper of choice Into Selection.
Deselect.
Apply the Mask.
Merge Group.
Duplicate.
Add your copyrights.
Add your name.
Give it a slight inner bevel:
Resize all layers to your liking.
I ended up resizing mine only 90%.
I hope you enjoyed this tutorial.
I’d love to see your results and show it off in my gallery.
Email me!
Hugs,
Bev

No comments:
Post a Comment