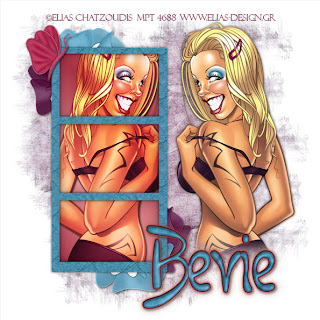
Clicking on the image will enlarge to full view.
Supplies
1 tube of choice - I’m using the artwork of Elias Chatzoudis which you can purchase here
Font of Choice - I’m using Boomerang here
Weescotlass Mask 297 here
Filters Unlimited 2.0 - Optional
EyeCandy 5 - Impact: Gradient Glow - Optional
“Some Kinda Spring” a FTU tagger size scrap kit, also available in full size created by Monica’s Sweet Addiction and can be found here.
Please leave a thank you when downloading. It’s a small gesture for hard work given freely.
This tutorial was written assuming you have working knowledge of PSP.
~♥~ Let’s get started ~♥~
Open up a 700 X 700 blank canvas. Flood fill white.
Copy and paste Element 22 as a new layer. Resize 70%.
Move slightly to the left of your canvas.
Filters Unlimited 2
Paper Texture/Japanese Paper
Default Settings
OK
If you don’t have this filter then click on
Effects/Texture Effects
Play around in it and find one you like :O)
Use your Magic Wand and click inside the frames. Selections/Modify/Expand by 6.
New Raster layer below the frame layer and flood fill with a gradient made with colors from your tube.
Deselect.
Copy and paste your tube above the frame - positioning it off to the right. When you have it exactly where you want it, duplicate. Move the duplicated layer just below the frame in your layers pallet.
Use your Magic Wand and click inside each of the frames again.
Selections/Invert.
Tap the delete key.
Deselect.
Change the properties to Hard Light.
Close out your white canvas and merge visible.
Re-open your white canvas.
Add your elements. I used:
Element 3 & 4: Resize 40%
Element 11: Mirror. Resize 50%. Free rotate left 20 degrees
Element: 24. Colorize. Free rotate right 30 degrees.
Adjust/Add Remove Noise/Add Noise
Gaussian checked
Noise: 30%
Monochrome checked
Highlight your white canvas.
New Raster layer.
Select All.
Copy and paste a paper of choice Into Selection.
Deselect.
Apply the mask.
Merge Group.
Add your copyrights.
Add your name.
I used a dark color for foreground. Then made a new canvas, filled with with the color of the frame and applied the same Japanese Paper affect to it. In my color pallet, I used that set as pattern for the background.
Typed my name.
I also gave mine an inner bevel:
Bevel: 2
Width: 7
Smoothness: 25
Depth: 7
Ambience: 11
Shininess: 27
Color: white
Angle: 135
Intensity: 25
Elevation: 71
OK
Then added a Gradient Glow.
EyeCandy 5 - Impact/Gradient Glow
Basic Tab:
Outside Glow checked
Mask Selection checked
Glow Radius: 30
Soft Corners: 0
Overall Opacity: 100
Distortion Amount: 0
Distortion Lump Size: 100
Gradient Smoothness: 97
Color: You Choose
OK
Resize all layers 85%.
I hope you enjoyed this tutorial.
I’d love to see your results.
Email me!
Hugs,
Bev

No comments:
Post a Comment